Having a high-performing website is crucial in today’s digital landscape. One way to enhance your website’s functionality and track important metrics is by using custom scripts. In this blog post, we’ll explore how to add custom scripts using Google Tag Manager and discuss the importance of considering the compatibility of scripts with your website’s existing DOM elements.
Adding Custom Scripts with Google Tag Manager
Google Tag Manager is a powerful tool that allows you to easily add and manage various scripts on your website without modifying its code directly. To add a custom script, follow these simple steps:
Sign in to your Google Tag Manager account and select the relevant container for your website.

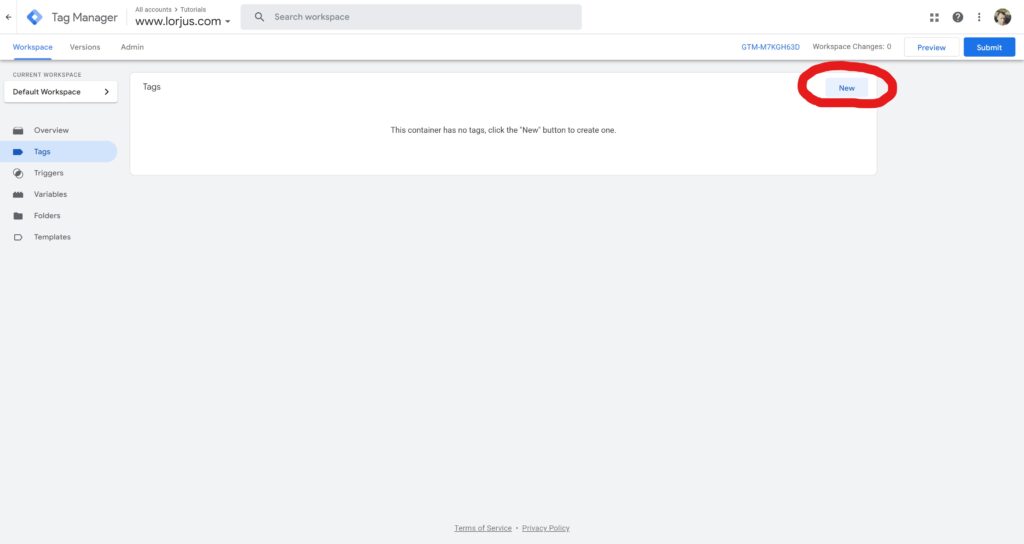
Navigate to the ‘Tags’ section and click on ‘New’.

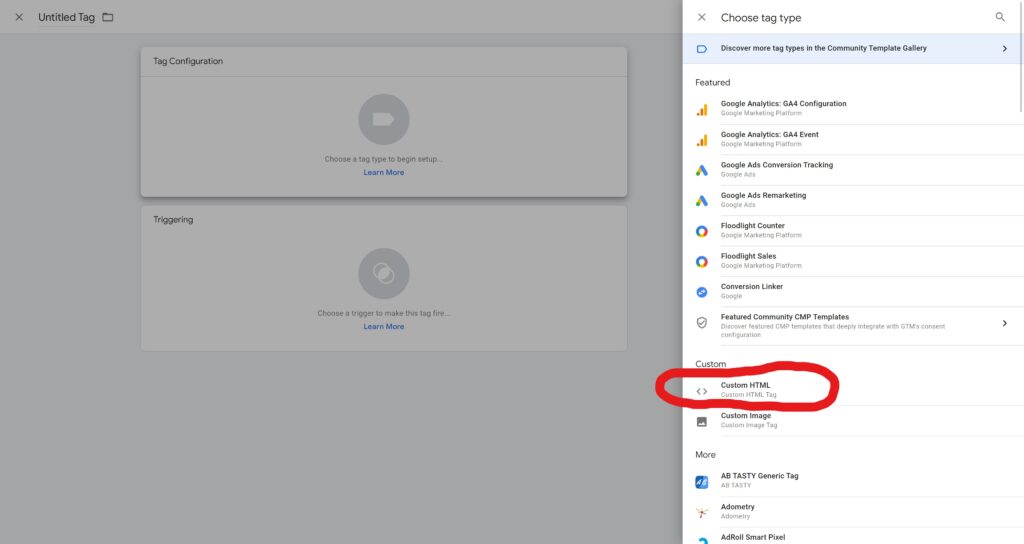
Select the ‘Custom HTML’ tag type.
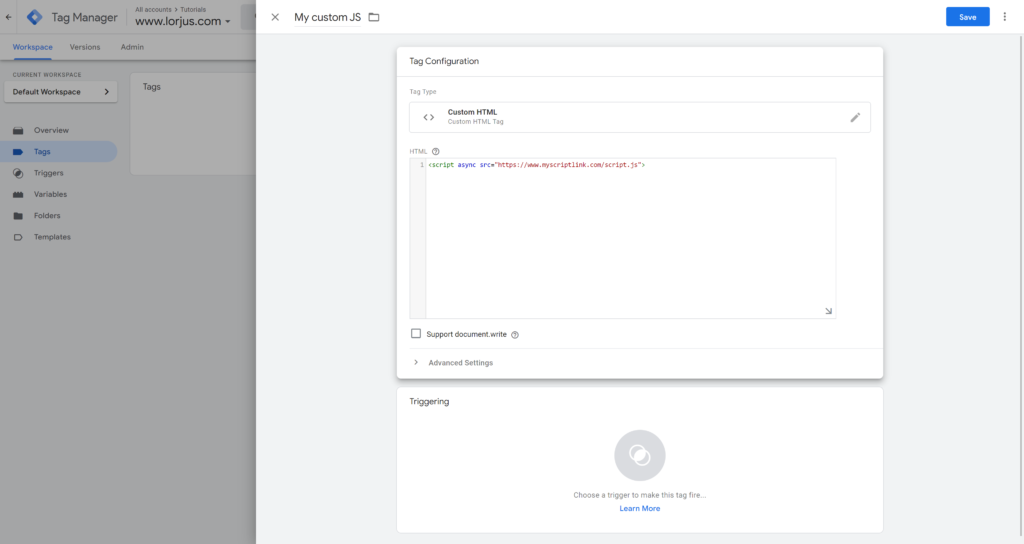
Give your tag a descriptive name and select the tag type that matches your custom script (e.g., HTML or JavaScript).

Copy and paste your custom script into the provided code editor, ie:
<script async src="https://www.myscriptlink.com/script.js"></script>
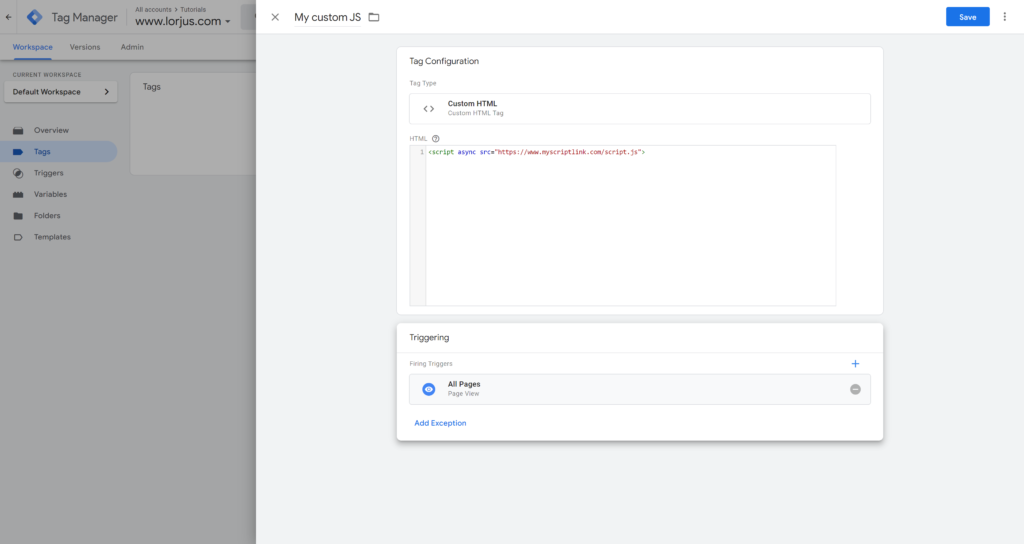
Set the trigger for your script, which determines when and where the script should run (e.g., on all pages, specific pages, or after a certain event).
Save your tag and publish the changes to your website.
With these steps, you can easily add custom scripts to your website without any hassle, giving you greater control over its functionality and tracking capabilities.
The Importance of Compatibility with Existing DOM Elements
While adding custom scripts can offer numerous benefits, it’s important to consider the compatibility of these scripts with your website’s existing DOM elements. DOM, or Document Object Model, refers to the structure of your website’s HTML elements.
Some custom scripts may require scanning or modifying existing DOM elements to function correctly. In such cases, it’s essential to ensure that your website’s HTML structure is compatible with the script’s requirements. Failure to do so may result in the script not working as intended or even causing conflicts with other elements on your website.
Having mentioned that – there’s also a possibility that the script you are trying to add might not be compatible to be added via Google Tag Manager. If the script is dependant on ‘document.onload’ or ‘document.ready’ to function and get DOM element(s) it might function intermittently or not function at all, as these events have already fired by the time the script is loaded. This is not an issue with scripts that insert their own DOM and do not require predefined elements to exist.
Before adding a custom script, it’s recommended to thoroughly test it on a staging or development site. This allows you to ensure that the script functions properly and does not interfere with your website’s existing elements. Additionally, staying up to date with any changes or updates to your website’s DOM structure will help maintain the compatibility of your custom scripts.
Conclusion
Custom scripts can greatly enhance your website’s performance and tracking capabilities. By using Google Tag Manager, you can easily add and manage these scripts without the need to modify your website’s code directly. However, it’s crucial to consider the compatibility of your custom scripts with your website’s existing DOM elements to avoid any issues or conflicts. It is also important to understand how and when the script is checking your DOM elements.
Remember to thoroughly test any custom scripts before implementing them on your live website and stay informed about any changes to your website’s HTML structure. By doing so, you can ensure a seamless integration of custom scripts, improving your website’s functionality and user experience.


Leave a Reply
You must be logged in to post a comment.